Microfilm Scan Results |
|
ConclusionFor scanning low contrast, positive, 35 mm microfilm, I recommend using the Epson V750 Pro in reflective mode at 2400 dpi. The Epson V700 probably works equally well but I only had the V750 version available to me.
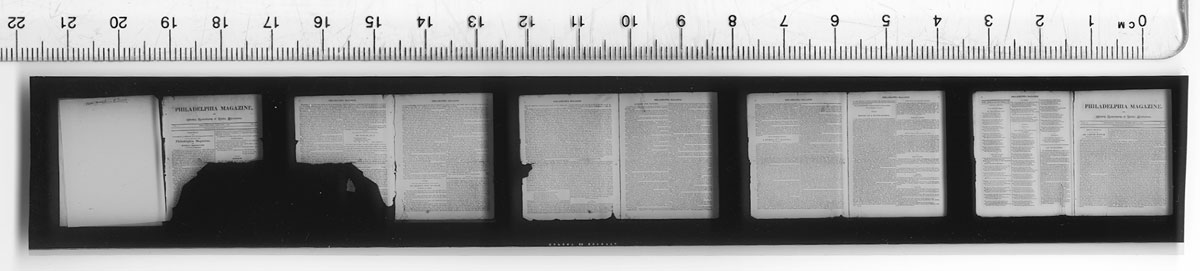
The Test I scanned a 5-frame strip of low contrast, positive, 35mm microfilm (see image #15 below), using four different methods: a Nikon Coolscan IV dedicated film scanner, a Canon 20D digital camera with a 180mm f/3.5 L macro lens and an Epson V750 Pro flatbed scanner in both reflective mode and transparency mode. Two variations on the transparency mode were also tested. One used a makeshift holder to keep the film flat (see image #16 below). The other variant involved laying the film directly on the lower glass with no holder. The results from the digital camera were not suitable. The Epson scanner in transparency mode delivered results equal to, and perhaps slightly better than, the Nikon film scanner. The Epson scanner in reflective mode was by far the easiest to use and delivered results almost as good as the transparency scans.
The SilverFast AI scanning software for the V750 Pro can not scan images larger than 4GB when installed on a 32 bit operating system This means that 3 microfilm frames is the maximum that could be scanned at one pass with the maximum optical resolution of 4800 dpi. It took 8 min and 45 seconds to do that scan. If one frame (2 pages) was scanned at a time, it took 1 min 45 seconds. This is less than 1/3 the three-frame time because the inter-frame area is not scanned when doing a single frame at a time. The scanning times seemed to be about the same for transparency mode and reflective mode. If the resolution was reduced to 2400 dpi, the scanning time went down by about 1/2 to 50seconds for a single microfilm frame.
At 4800 dpi, about 1,800 microfilm frames will fit on a single sided DVD. At 2400, the DVD will hold about 3,600 frames.
When scanning large batches, I recommend creating a user-defined scanning profile that contains an optimized tone cure and sharpening settings.
Click on the thumbnails below for larger images. |
|
|
#1 |
#2 |
|
|
|
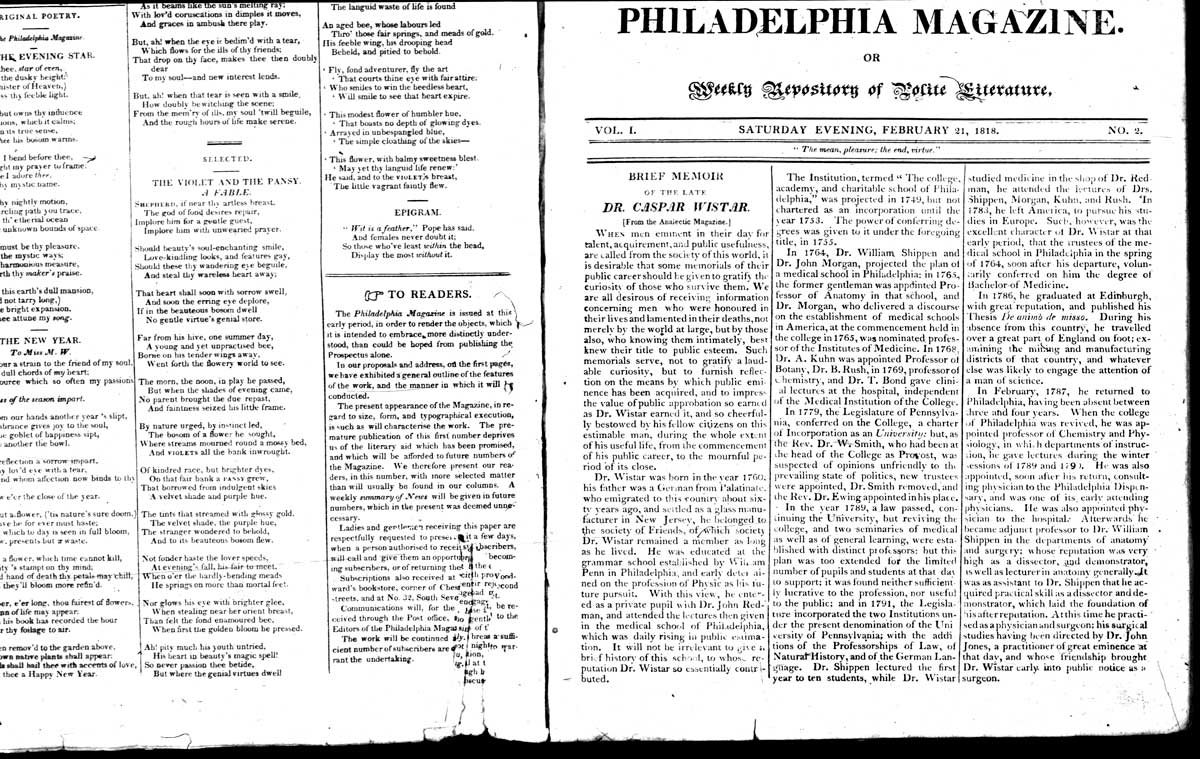
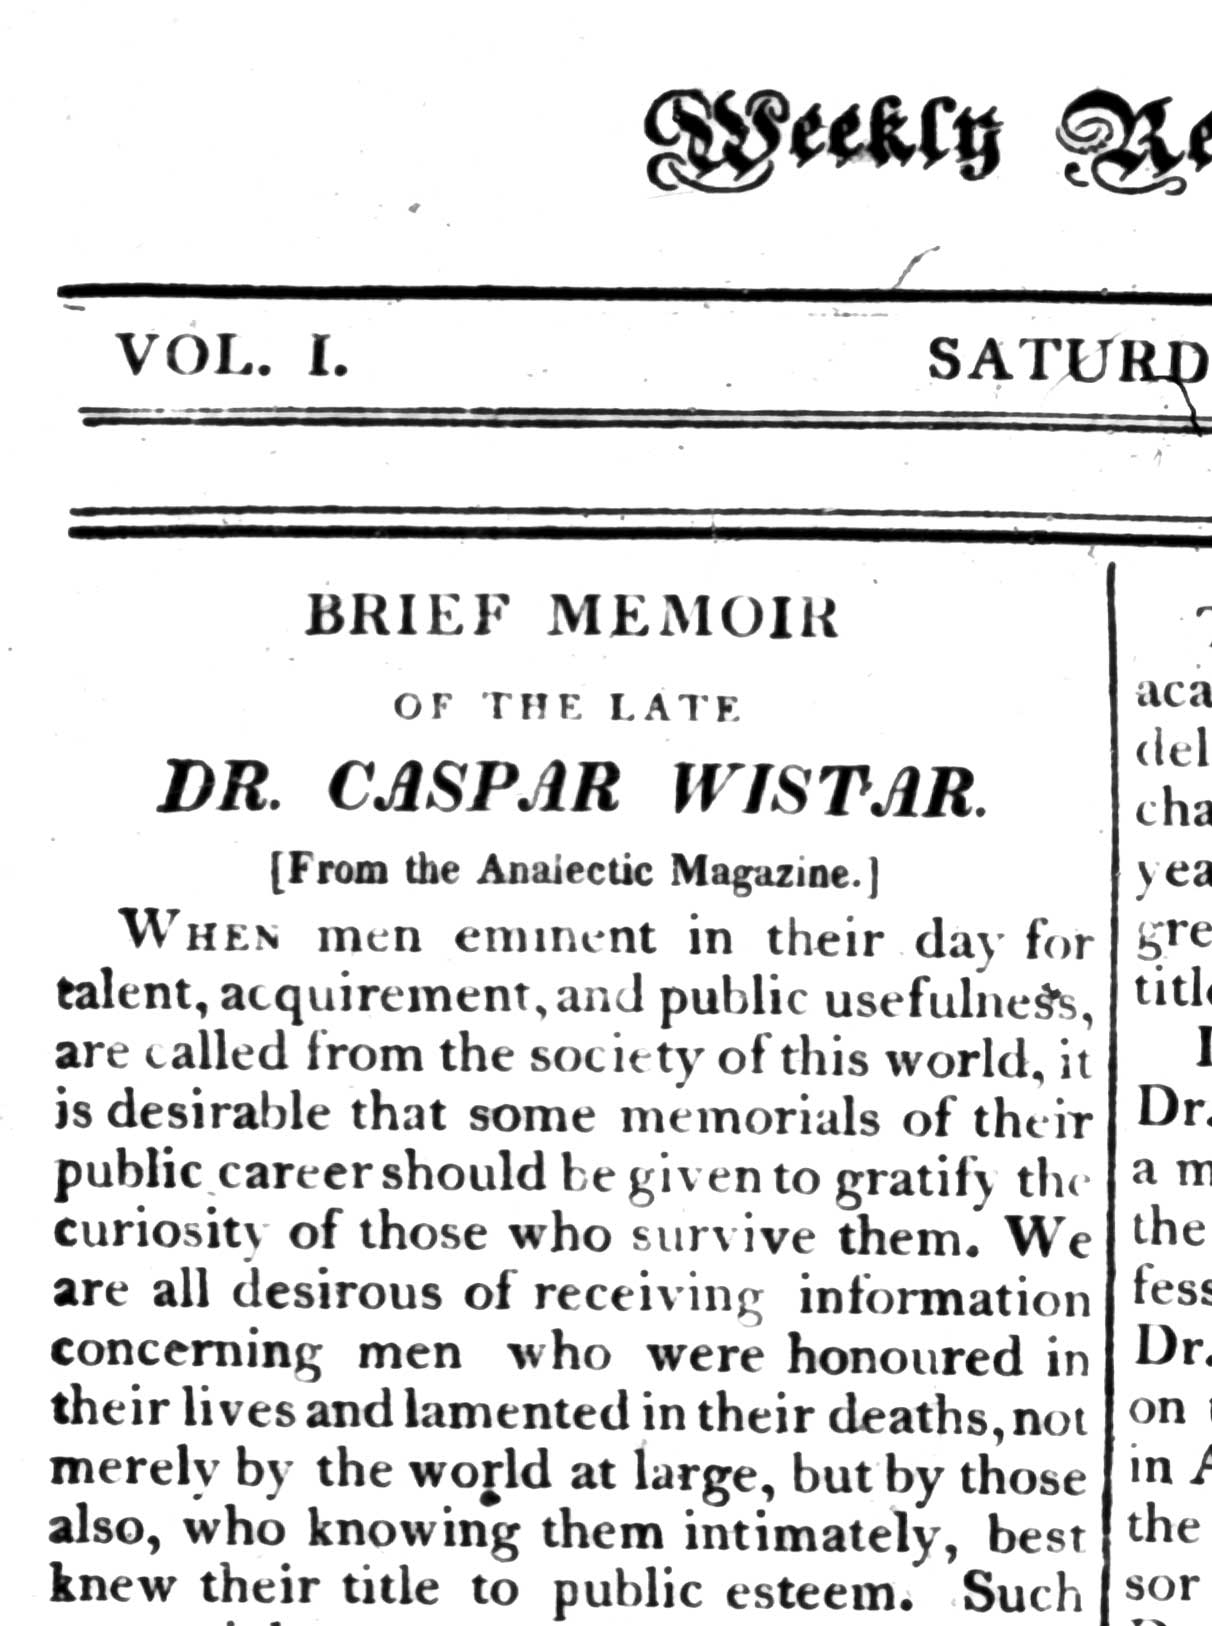
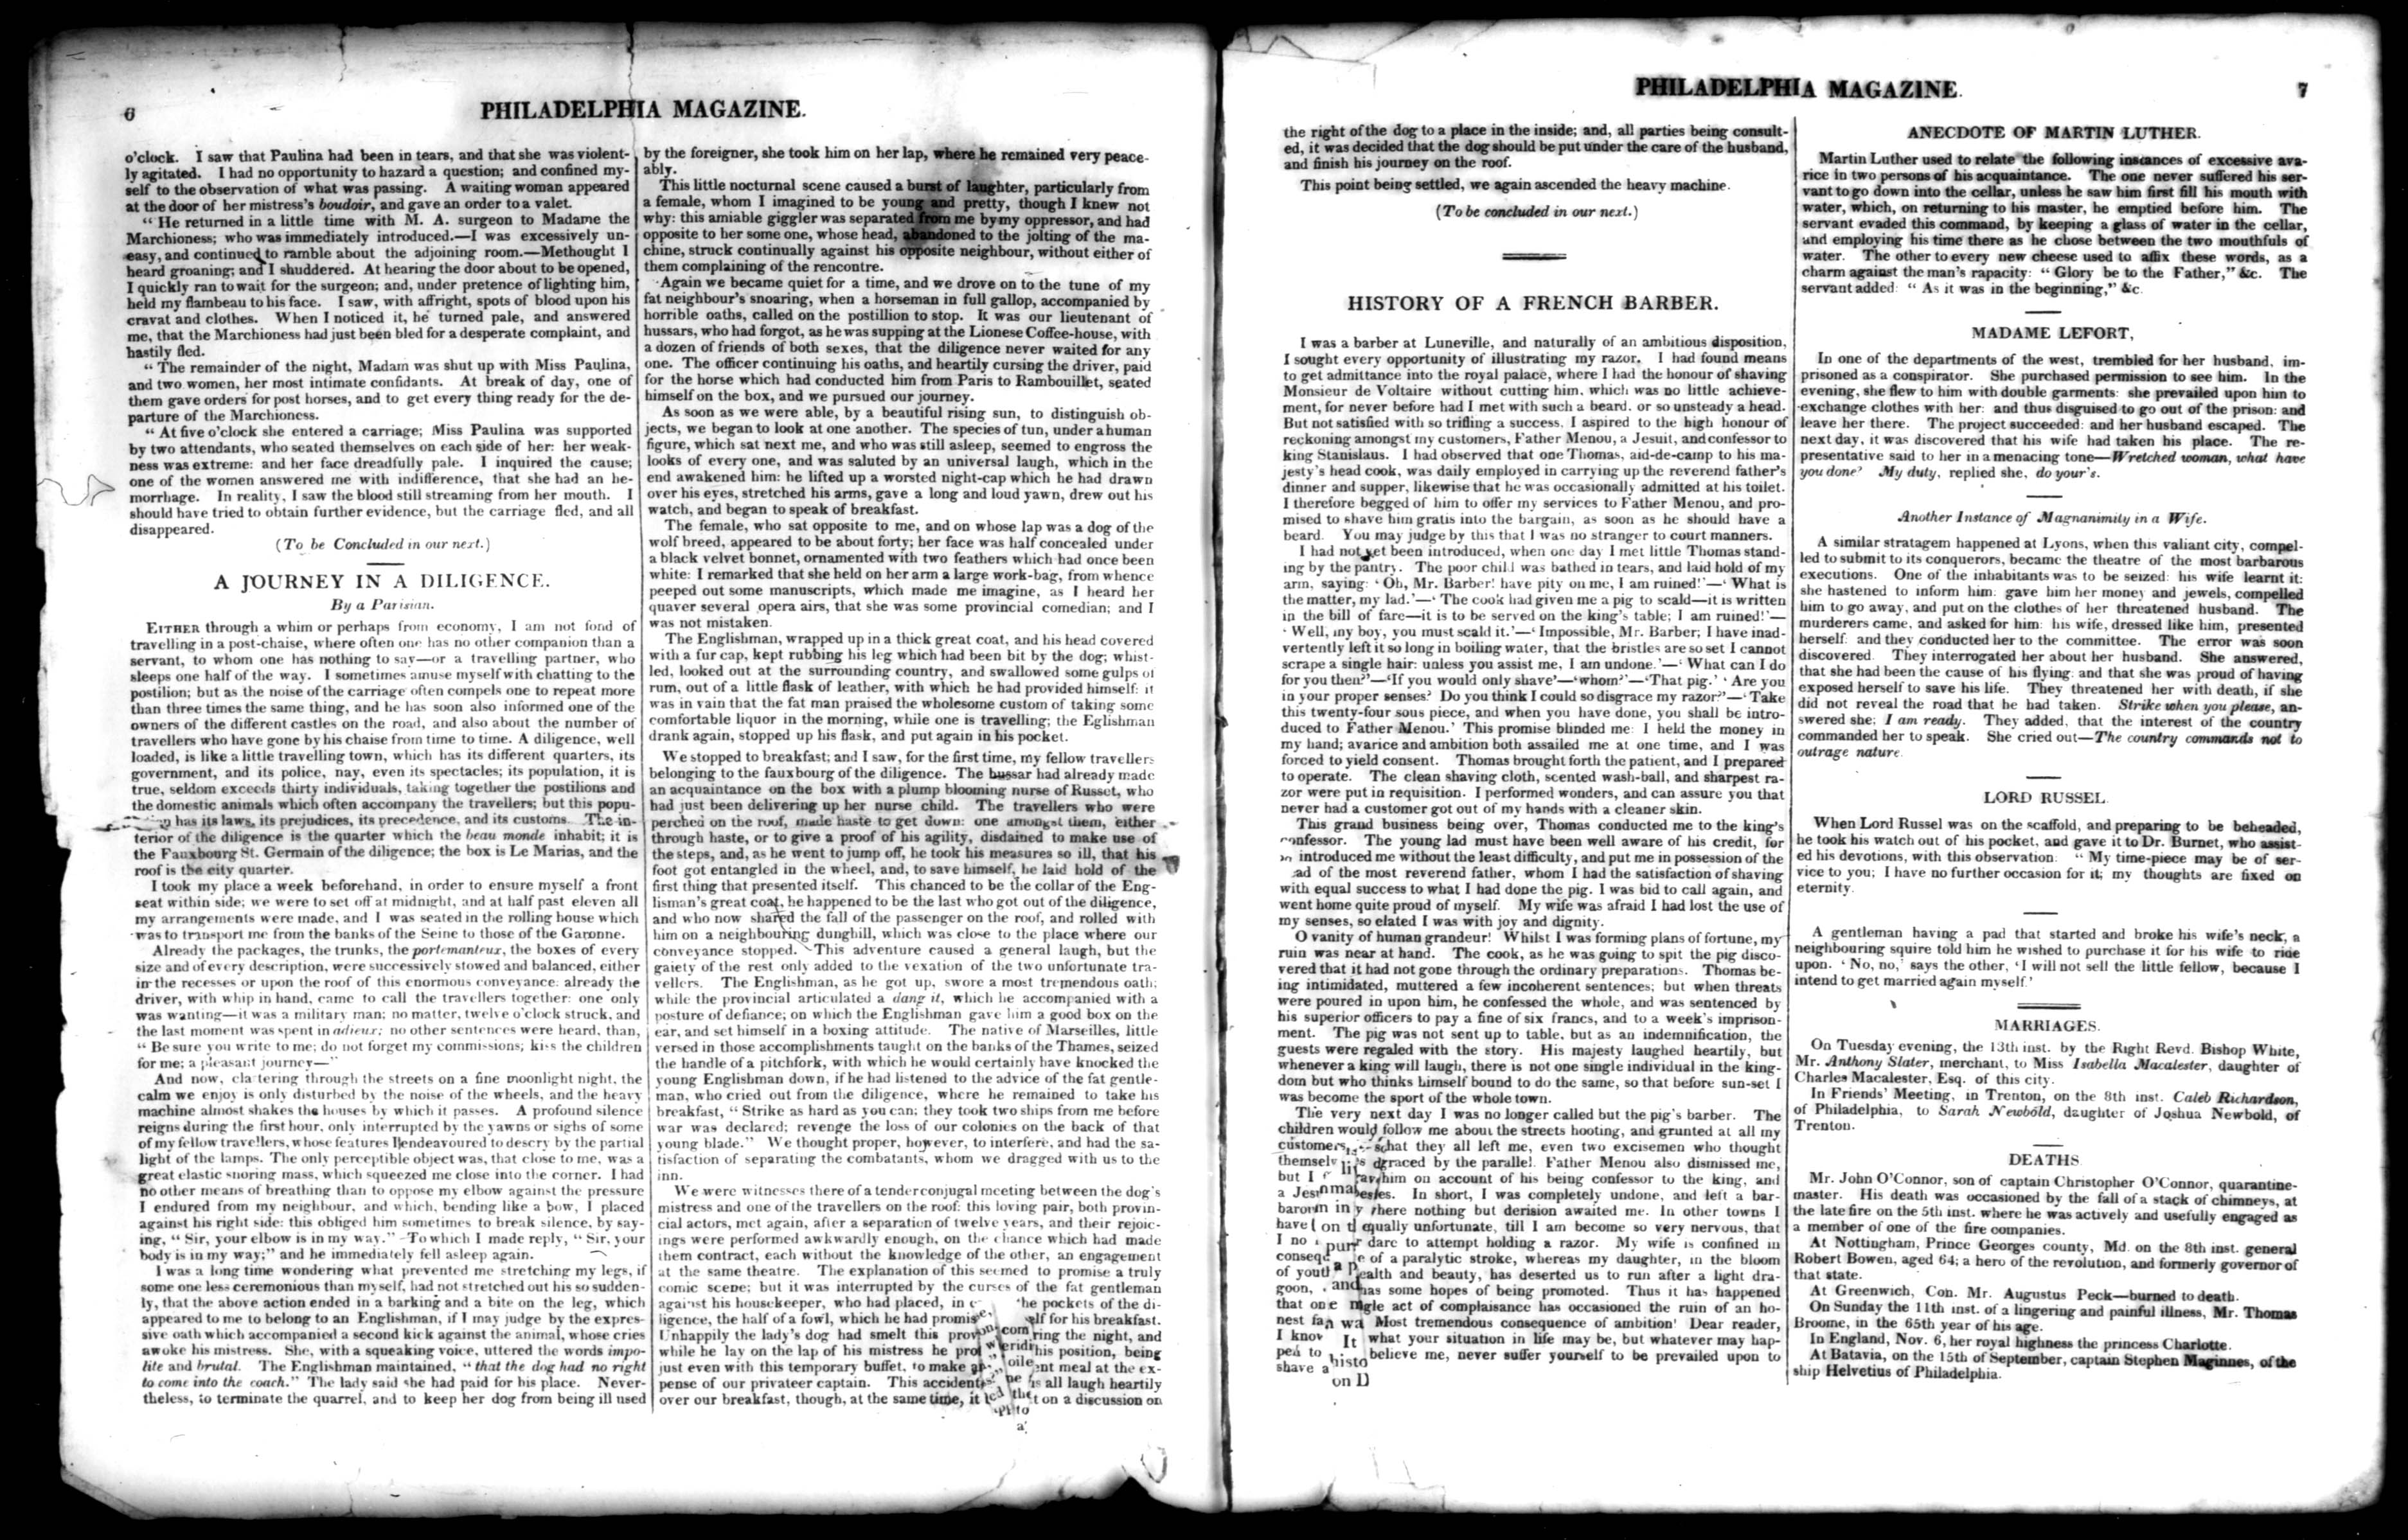
| Above is a reduced resolution version of an image scanned with a Nikon Coolscan IV Film Scanner using a 35mm film carrier at 2900 dpi. Notice how the carrier is too narrow vertically to allow capture of the entire width of the microfilm image. The film carrier's frame dividers are also too narrow horizontally to allow 2 pages to be captured at once. | Above is a reduced resolution version of an image scanned as a transparency, with an Epson V750 Pro flatbed scanner using the Epson 35mm film carrier at 4800 dpi and 16->8 bit grayscale. Notice how the carrier is too narrow vertically to allow capture of the entire width of the microfilm image. |
|
#3 |
#4 |
 |
 |
| Photographed with a Canon 20D and a 180mm f/3.5 L macro. Illuminated from behind with a flood light and white diffuser paper. This might work if a proper jig were constructed to keep the camera square to the plane of the film and control other variables. That said, scanning is better. The only advantage of photography is that the capture time is much quicker. | Above is a reduced resolution version of an image scanned as a transparency, with an Epson V750 Pro flatbed scanner using a makeshift film holder. The scanner was set to 16->8 bit grayscale at 4800 dpi. The holder was merely the clear plastic front covers of two thin CD cases with the film laid between the cases and placed on the scanners glass. See below for a photo of the arrangement. |
|
#5 |
#6 |
 |
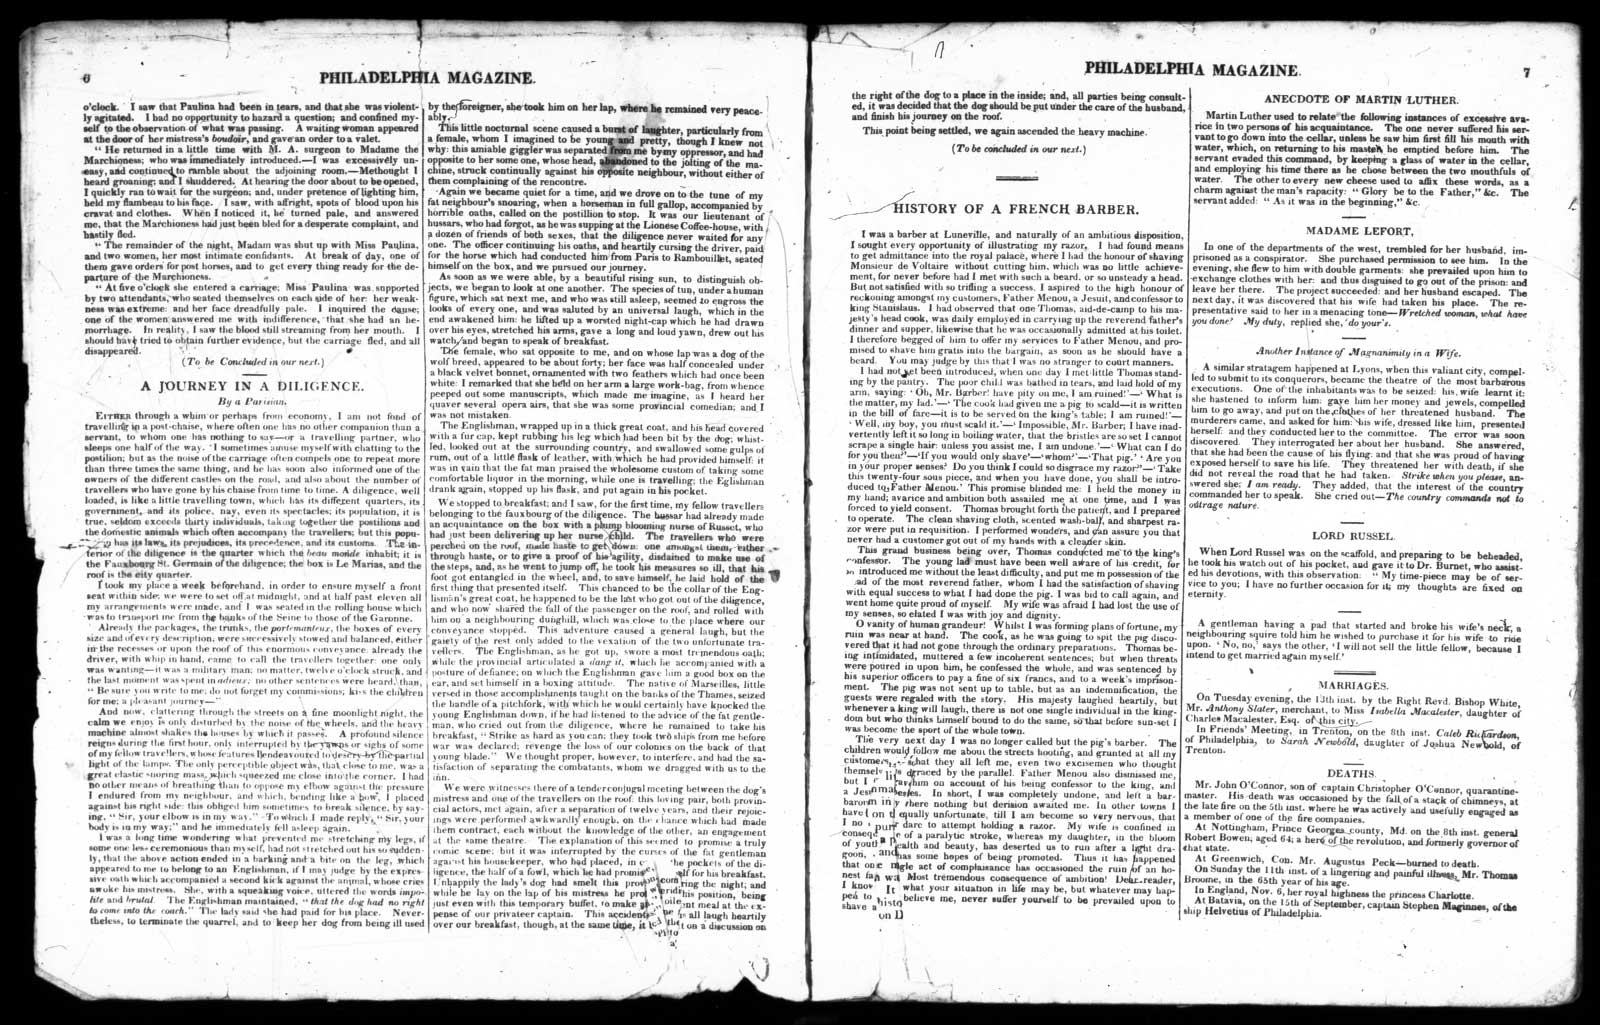 |
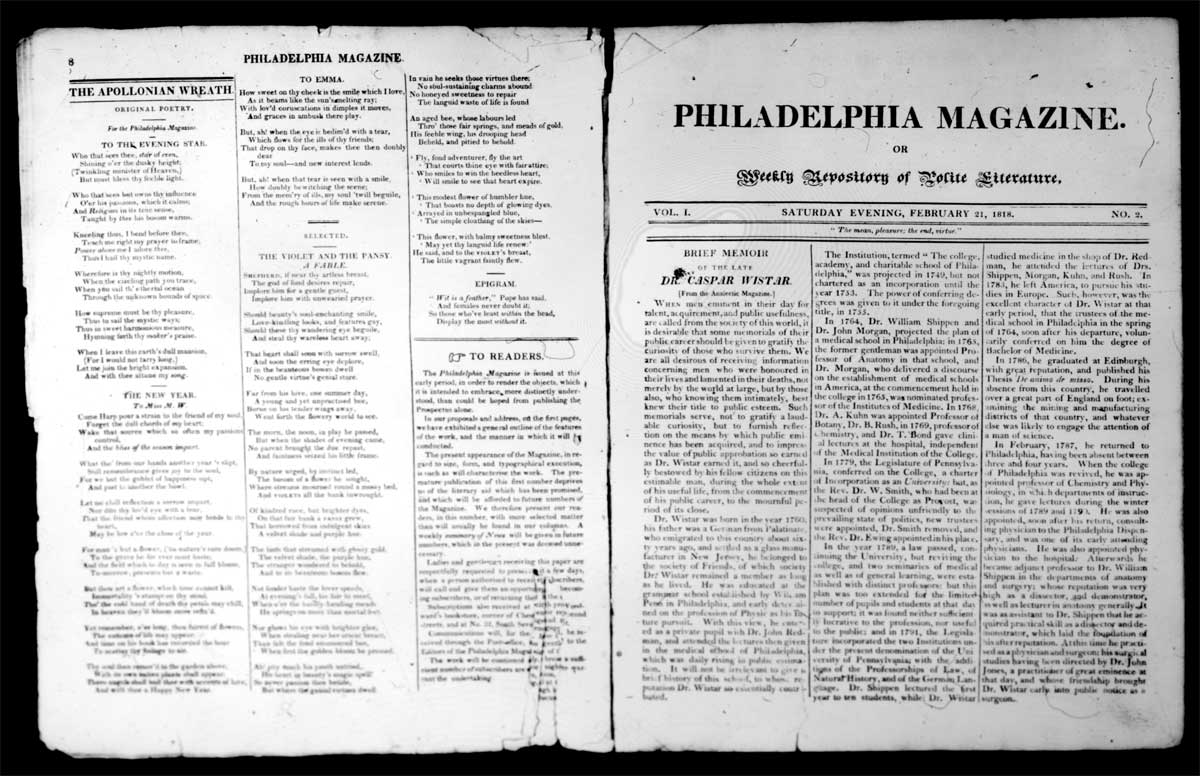
| This thumbnail links to a full-size crop of the 4800 dpi transparency scan shown in thumbnail #4. Unlike the reduced resolution images, this crop shows a portion of the 'full size' image, although it is still of slightly lesser quality than the original because it was compressed with 'medium' jpeg compression. | Click on the above to see a 1600 x 1025 pixel reduction of the original 7512 x 4812 pixel image. The original microfilm was scanned as a transparency, with an Epson V750 Pro flatbed scanner using 16 -> 8 bit grayscale at 4800 dpi |
|
#7 |
#8 |
|
|
|
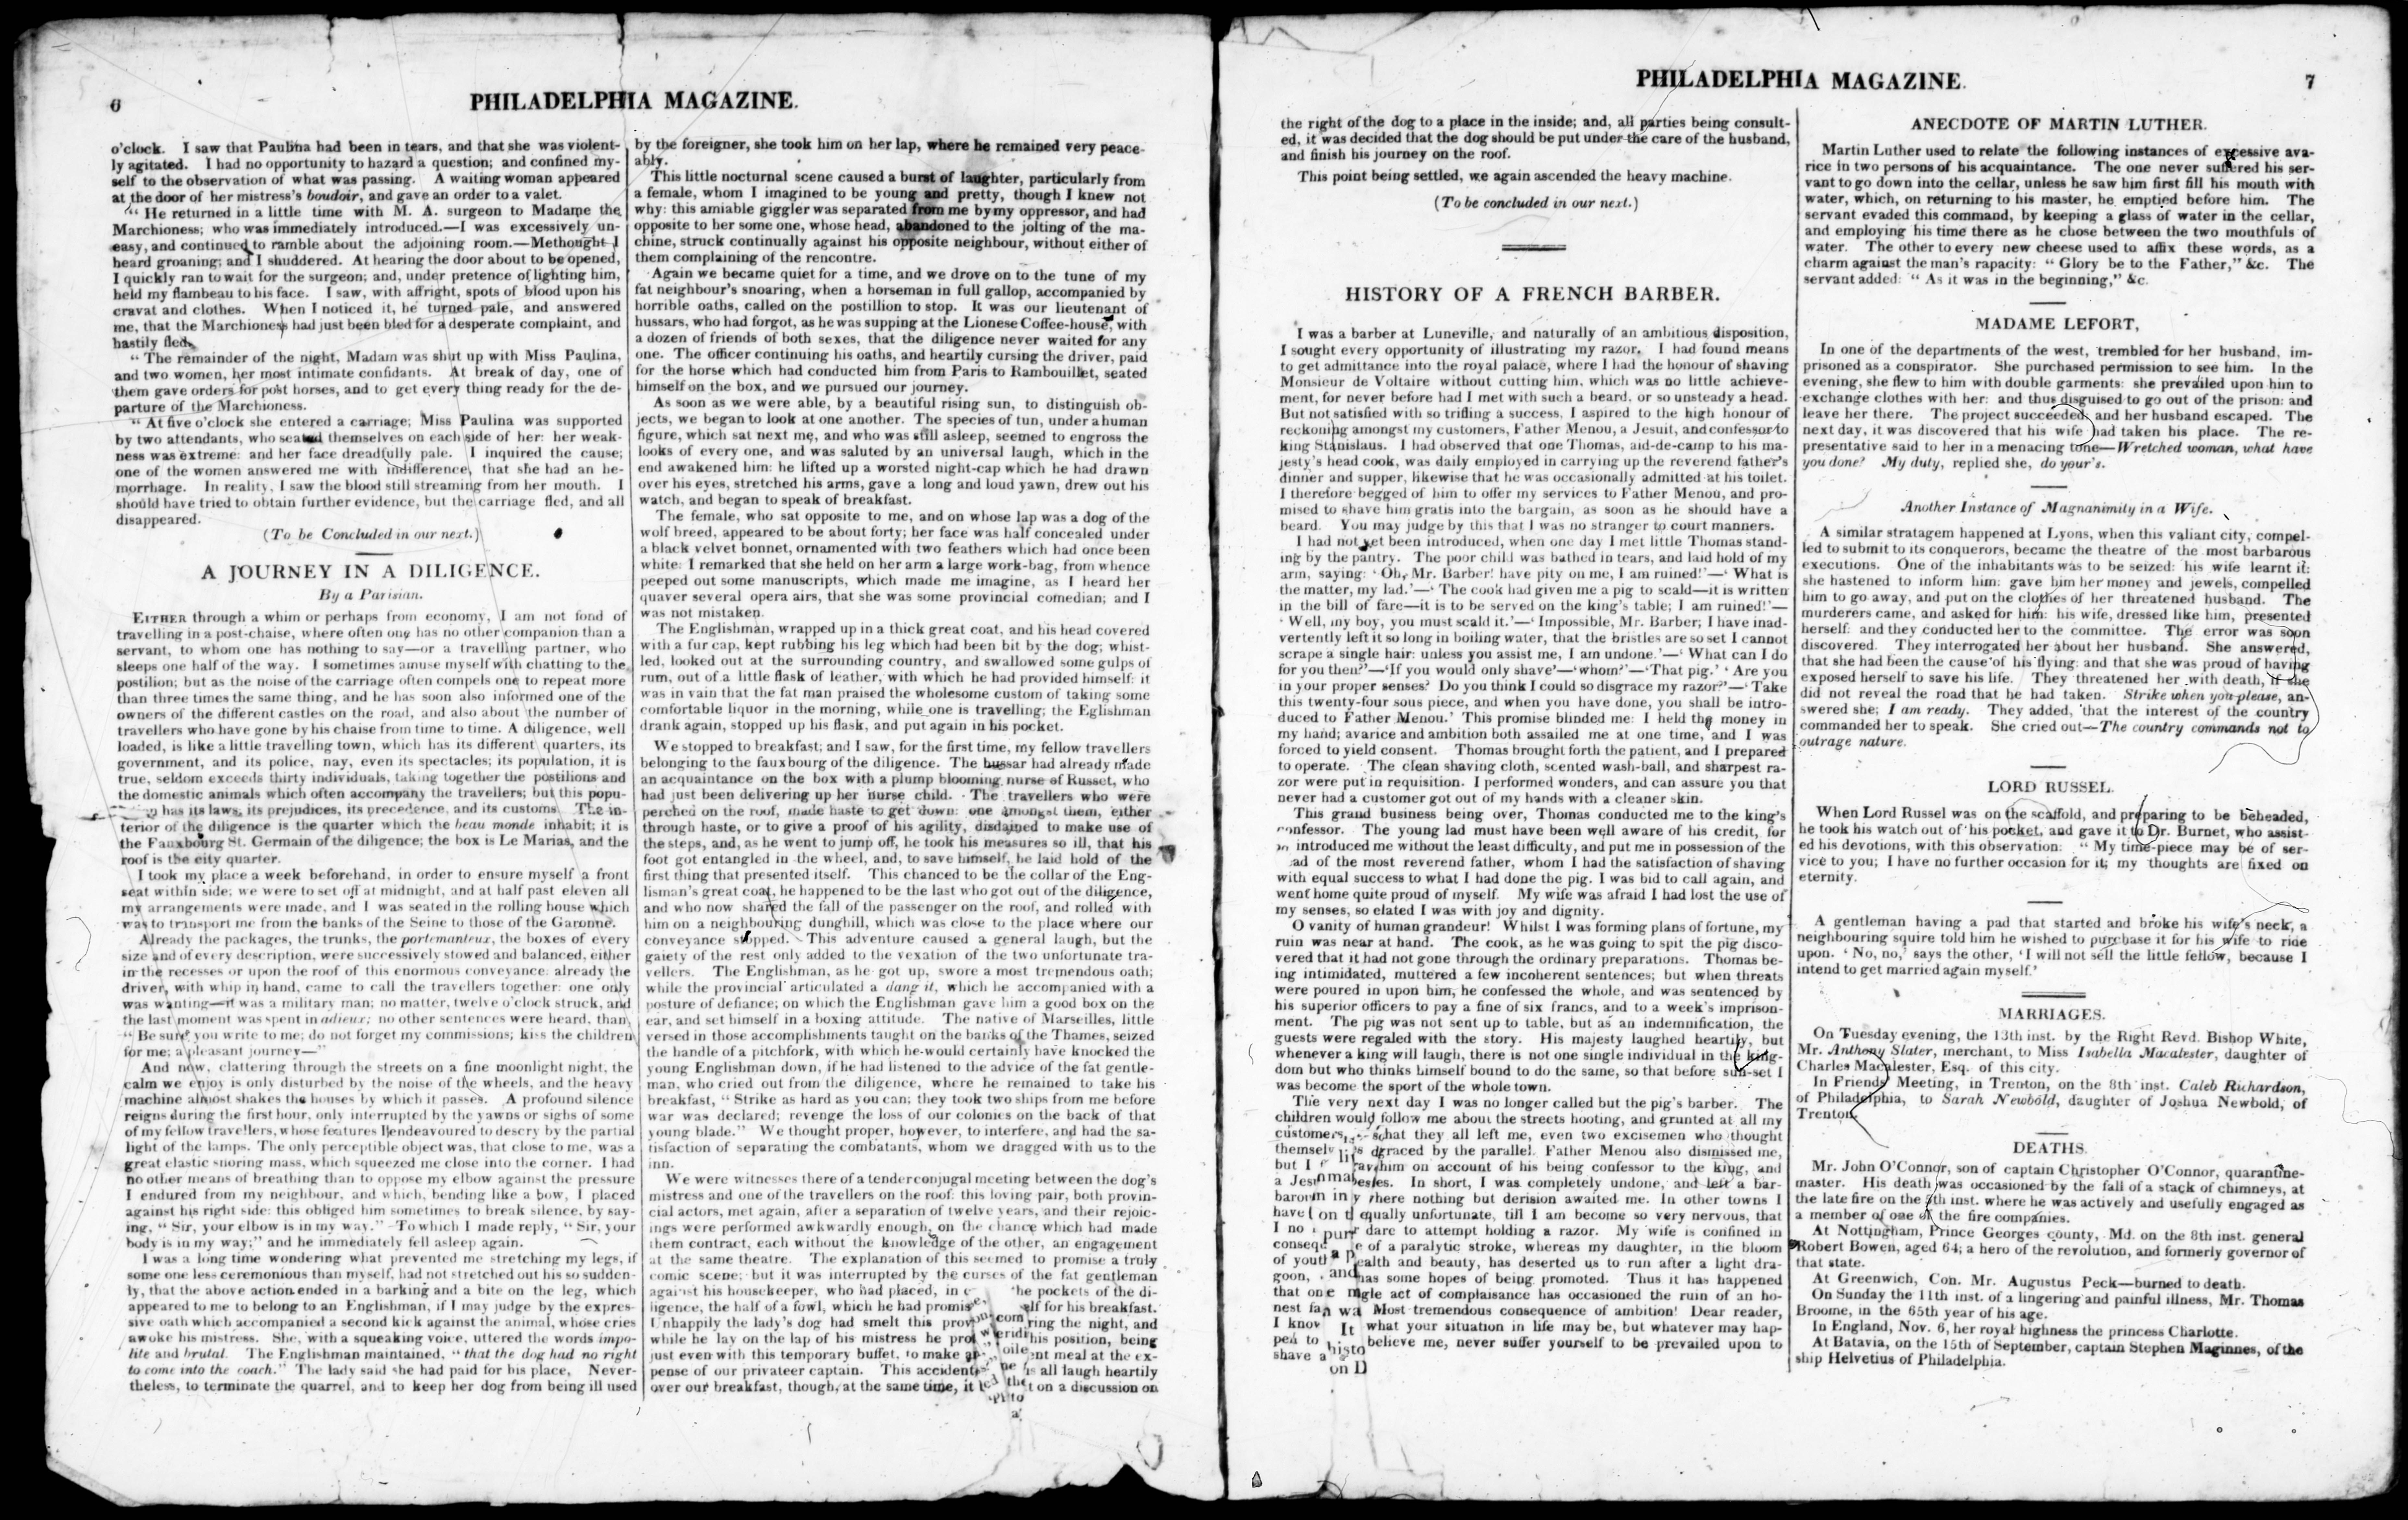
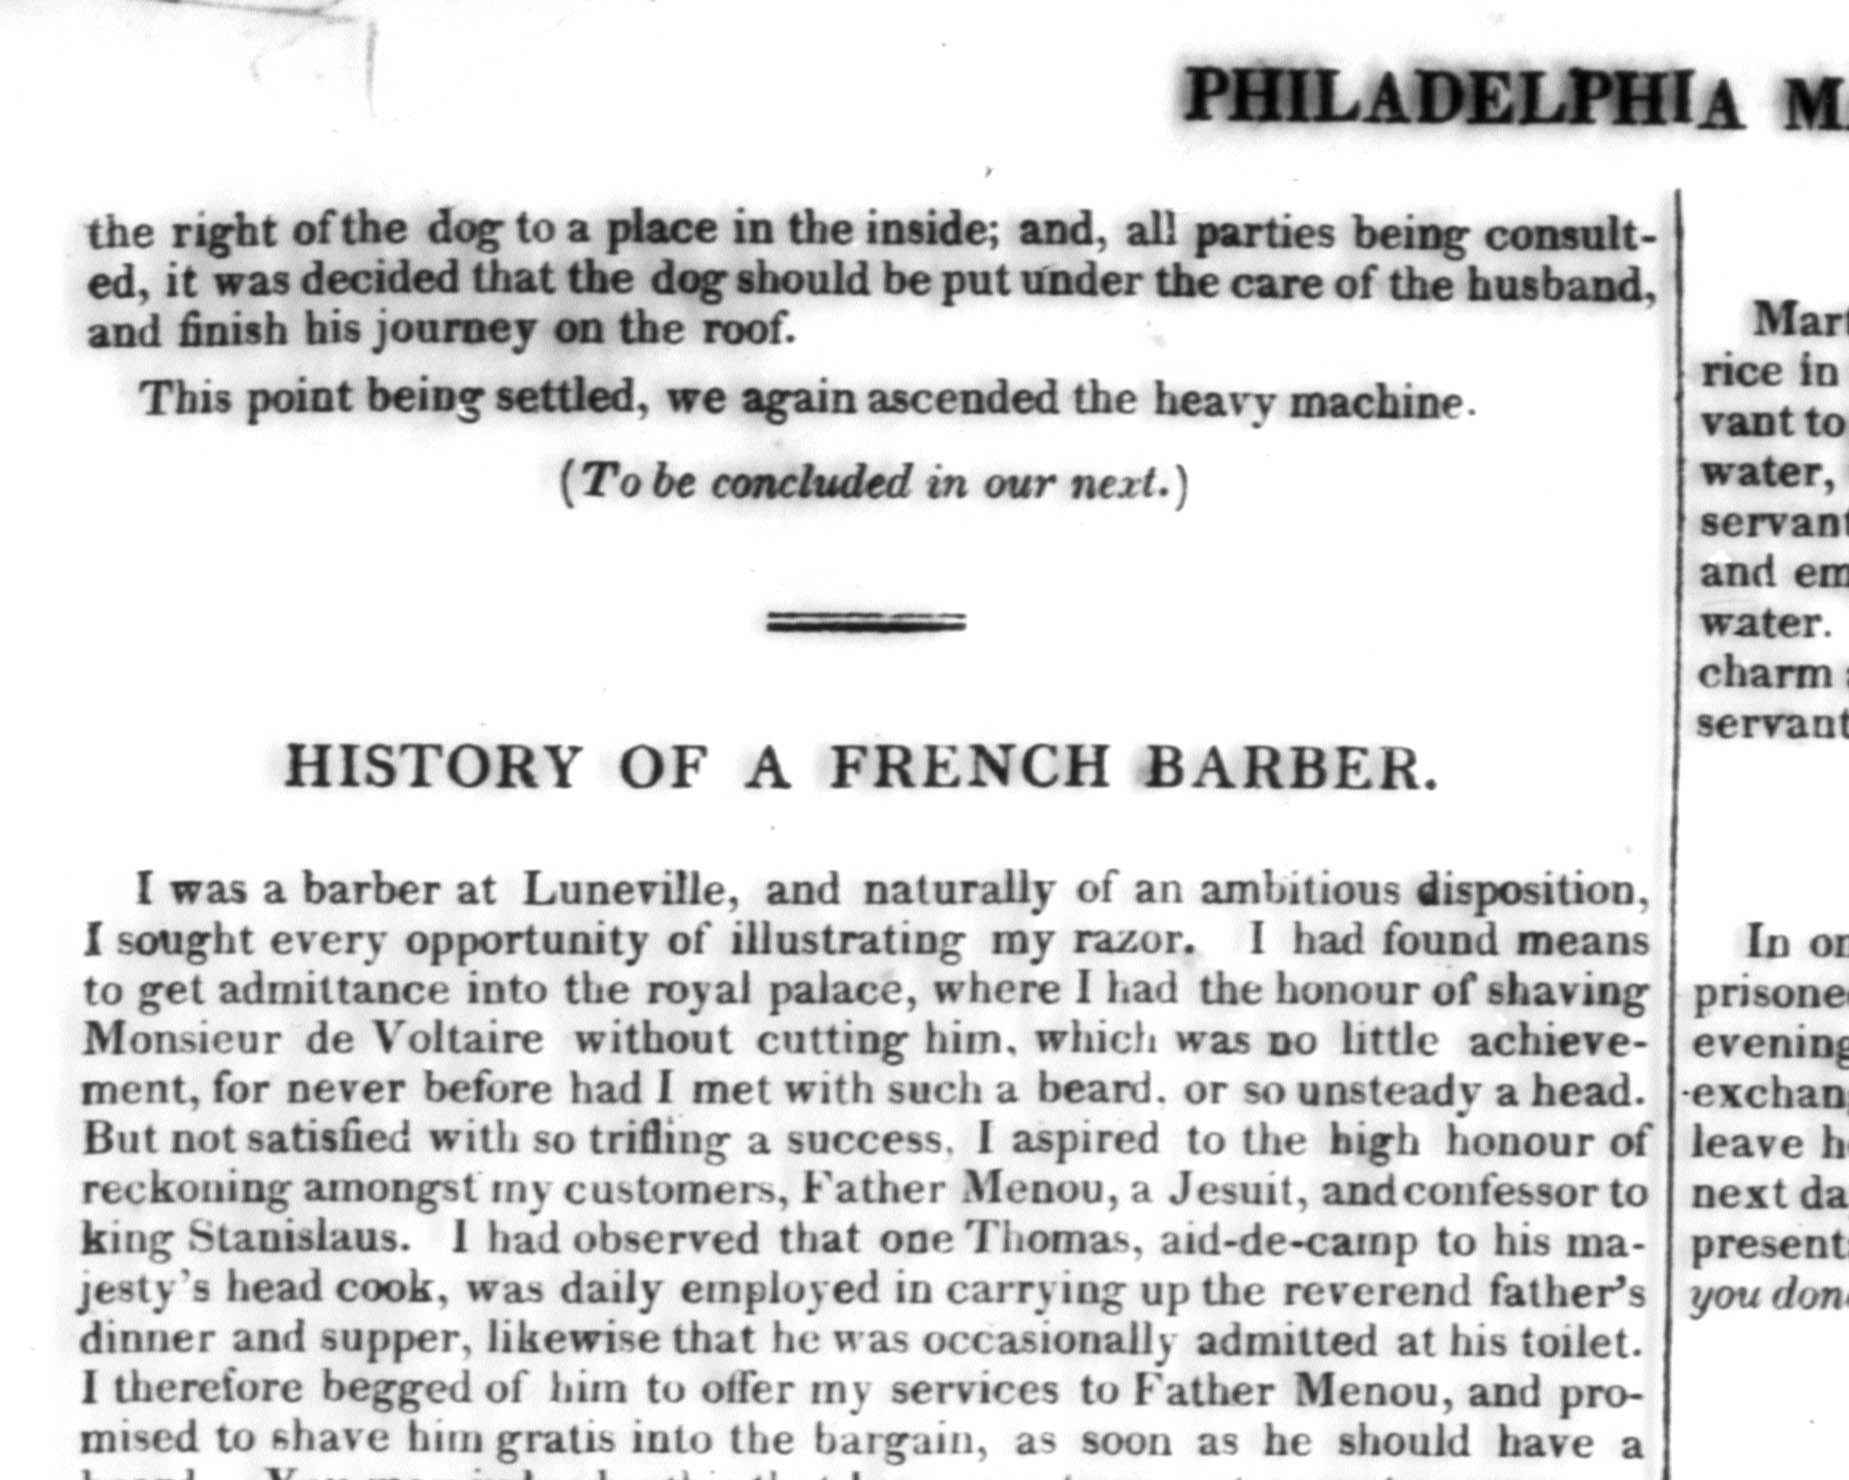
| This thumbnail links to a 2.5 MB file that is a full size image of a transparency scan from the Epson V750 Pro flatbed scanner using the makeshift film holder. It was set to 16->8 bit grayscale at 4800 dpi. This shows the same pages as the #6 image but a different scan. As you can see, the scan quality is very consistent from scan to scan. A jpeg compression setting of "7" was used in Photoshop CS3 to produce the jpeg file. | This thumbnail links to a 641 KB file in PNG format that is a full size, 1-bit Black & White conversion of the image linked to thumbnail #7. This image file is 1/4 the size of the grayscale version but the quality of the B&W images are significantly reduced from grayscale. In my opinion, low contrast microfilm should not be scanned or converted to B&W. Too much quality is lost. B&W may be OK for high contrast microfilm. |
| #9 |
#10 |
 |
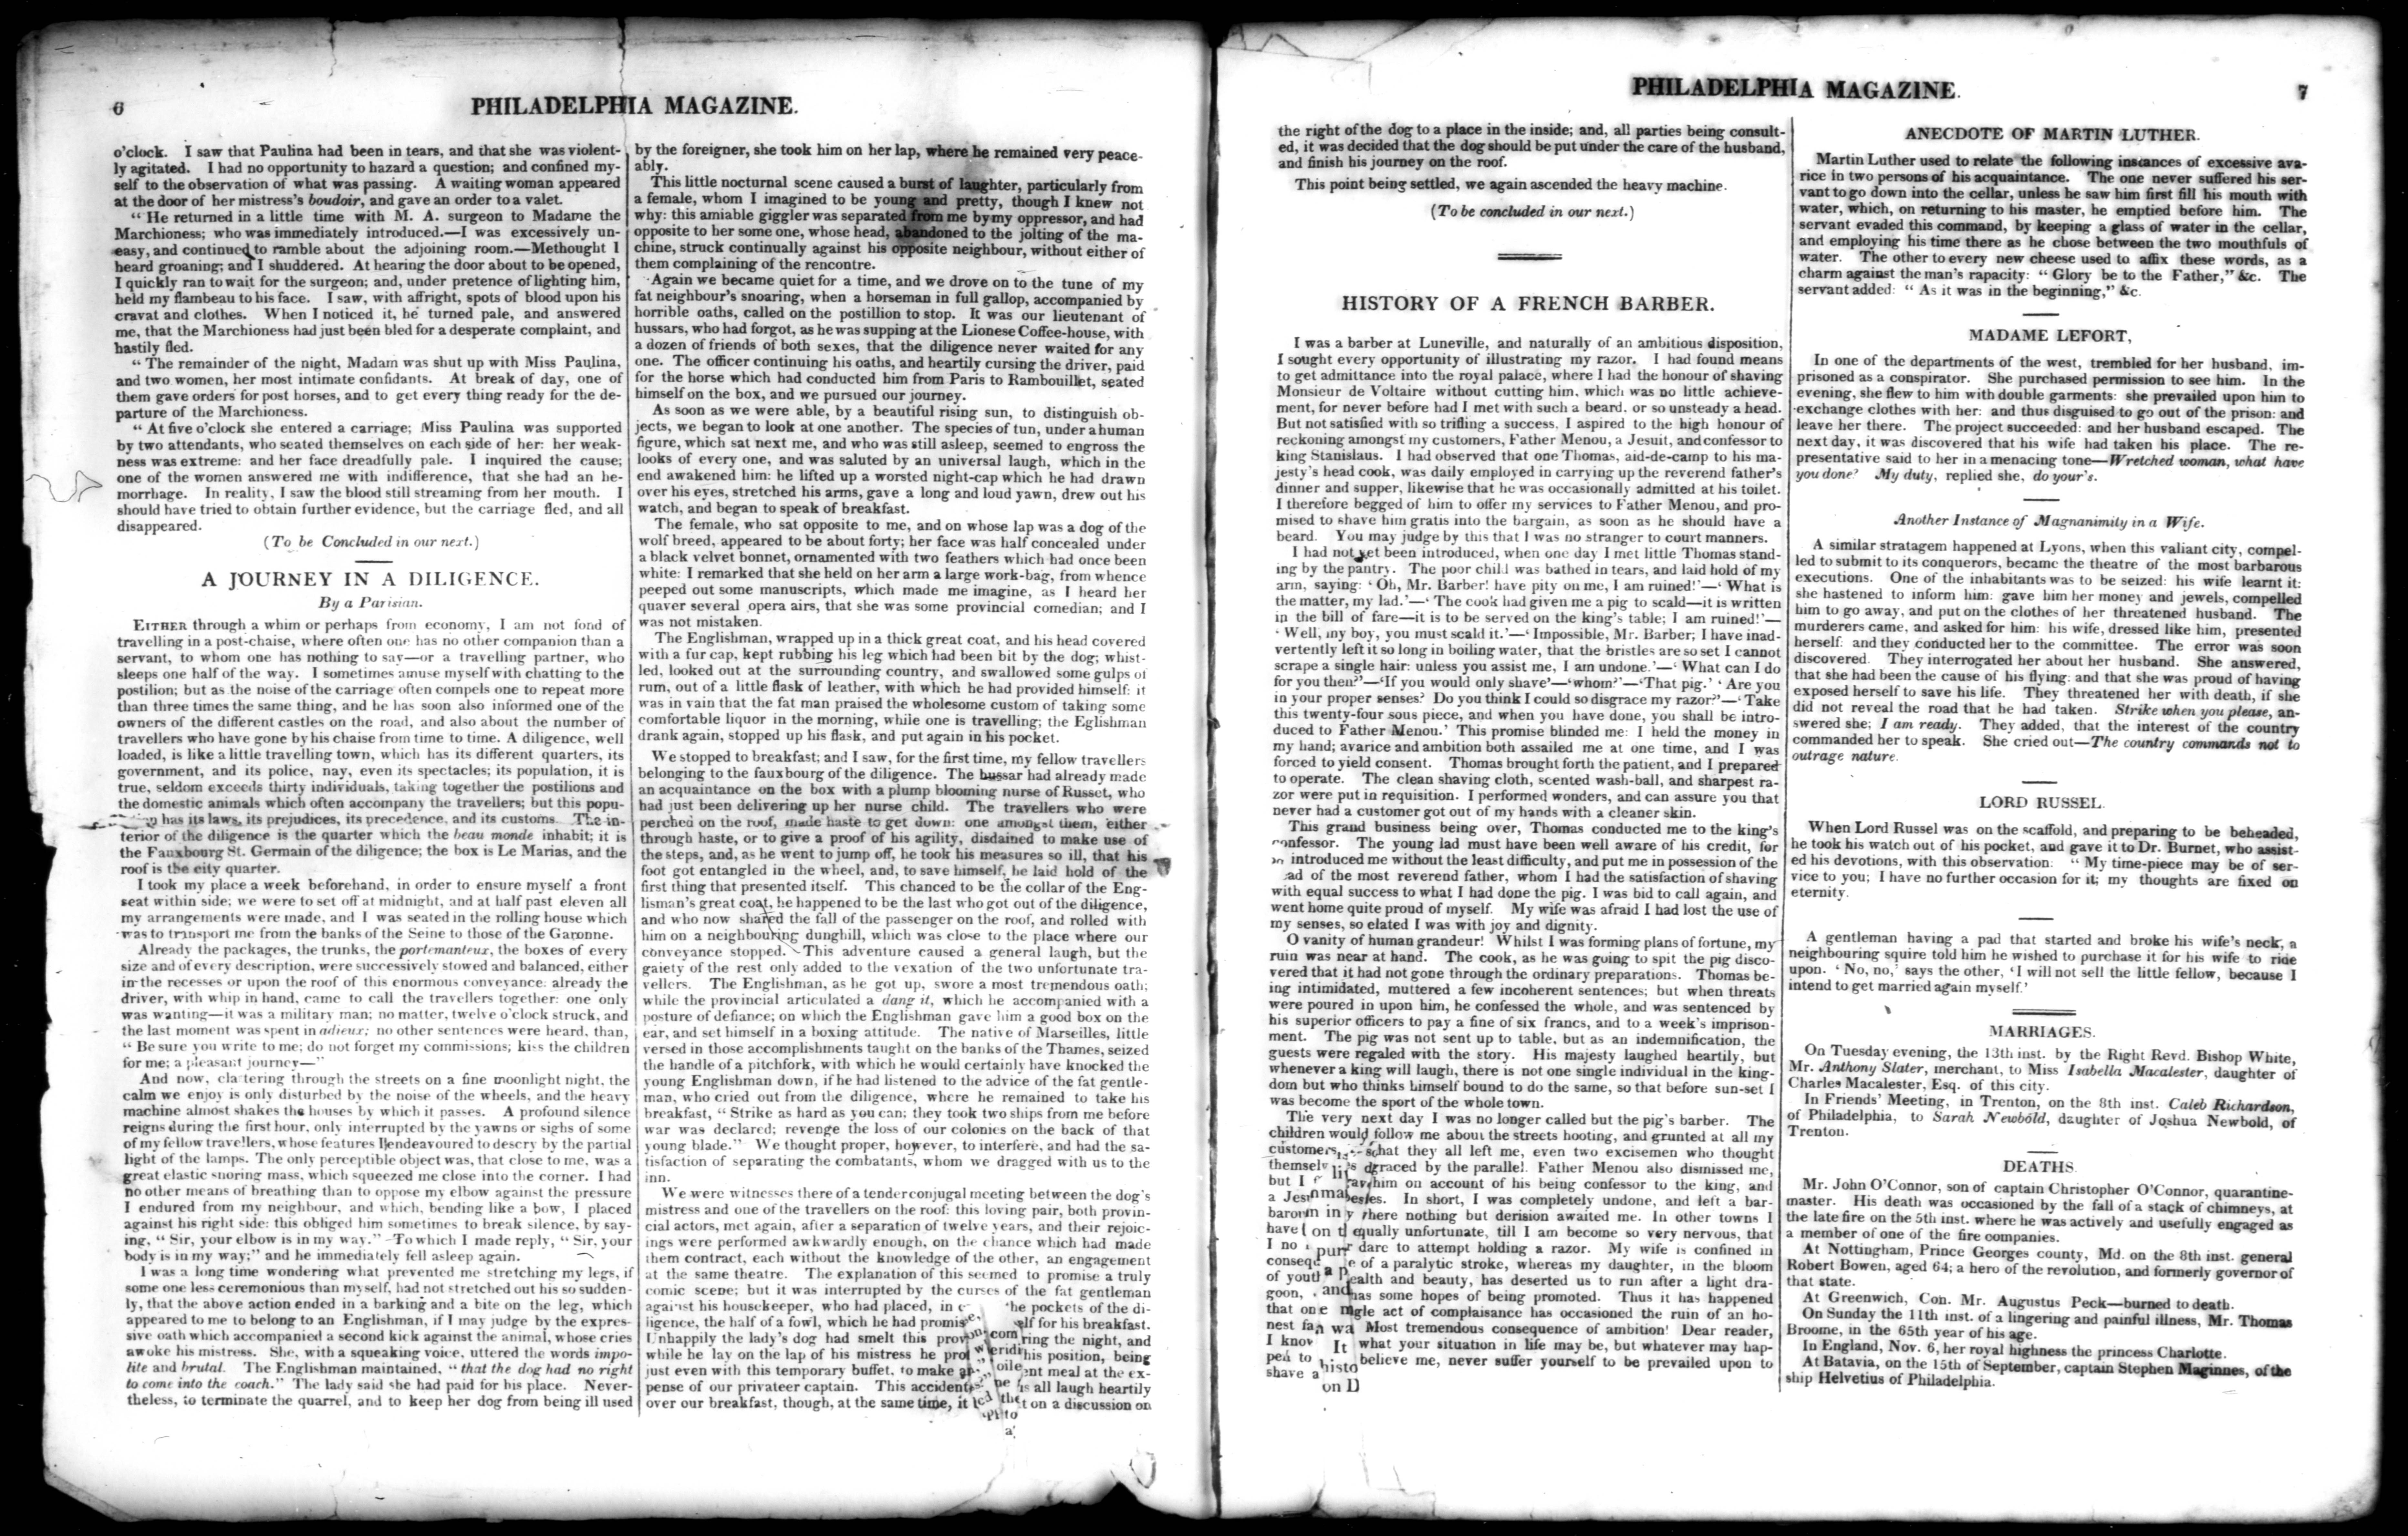 |
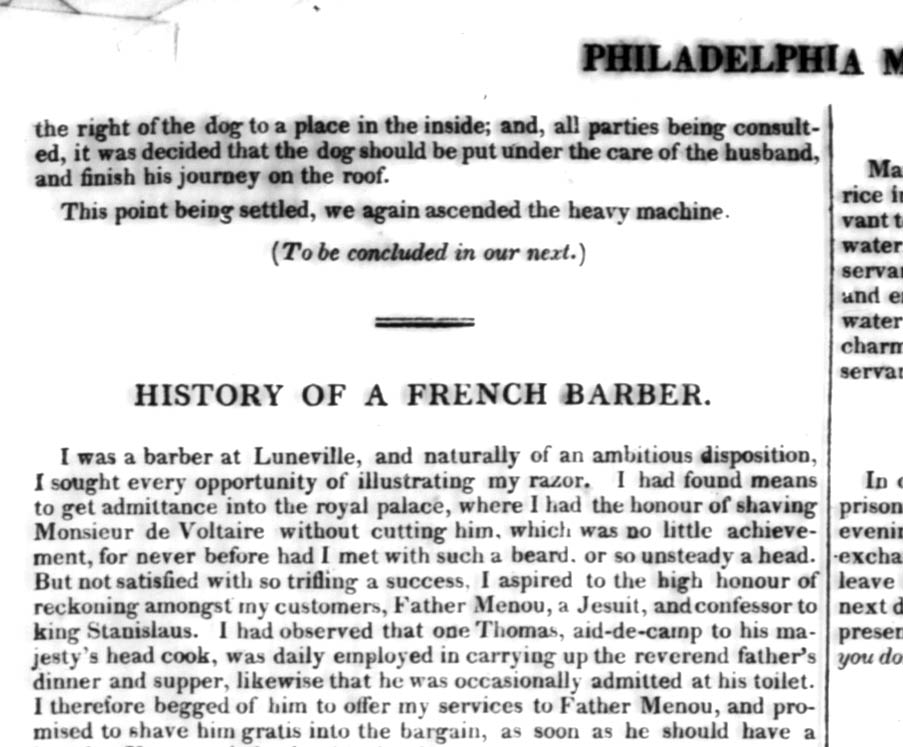
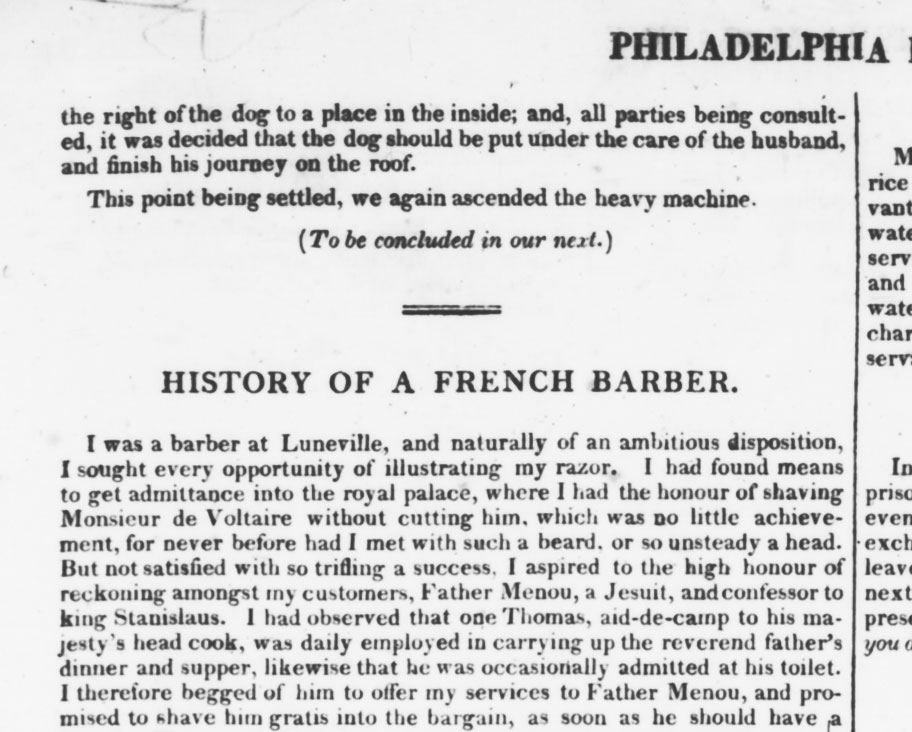
| This thumbnail links to a full-size crop of the 4800 dpi, reflective scan shown in thumbnail #10. This crop shows a portion of the 'full size' image linked to #10. It is still of slightly lesser quality than the original because it was compressed with 'medium' jpeg compression. | This thumbnail links to a 2.5 MB file that is a full size image of a scan from the Epson V750 Pro flatbed scanner. It was a reflective scan, set to 16->8 bit grayscale at 4800 dpi. This shows the same pages as the #7 image but scanned in reflective mode rather than as transparency film. A jpeg compression setting of "7" was used in Photoshop CS3 to produce the jpeg file. |
|
#11 |
#12 |
 |
 |
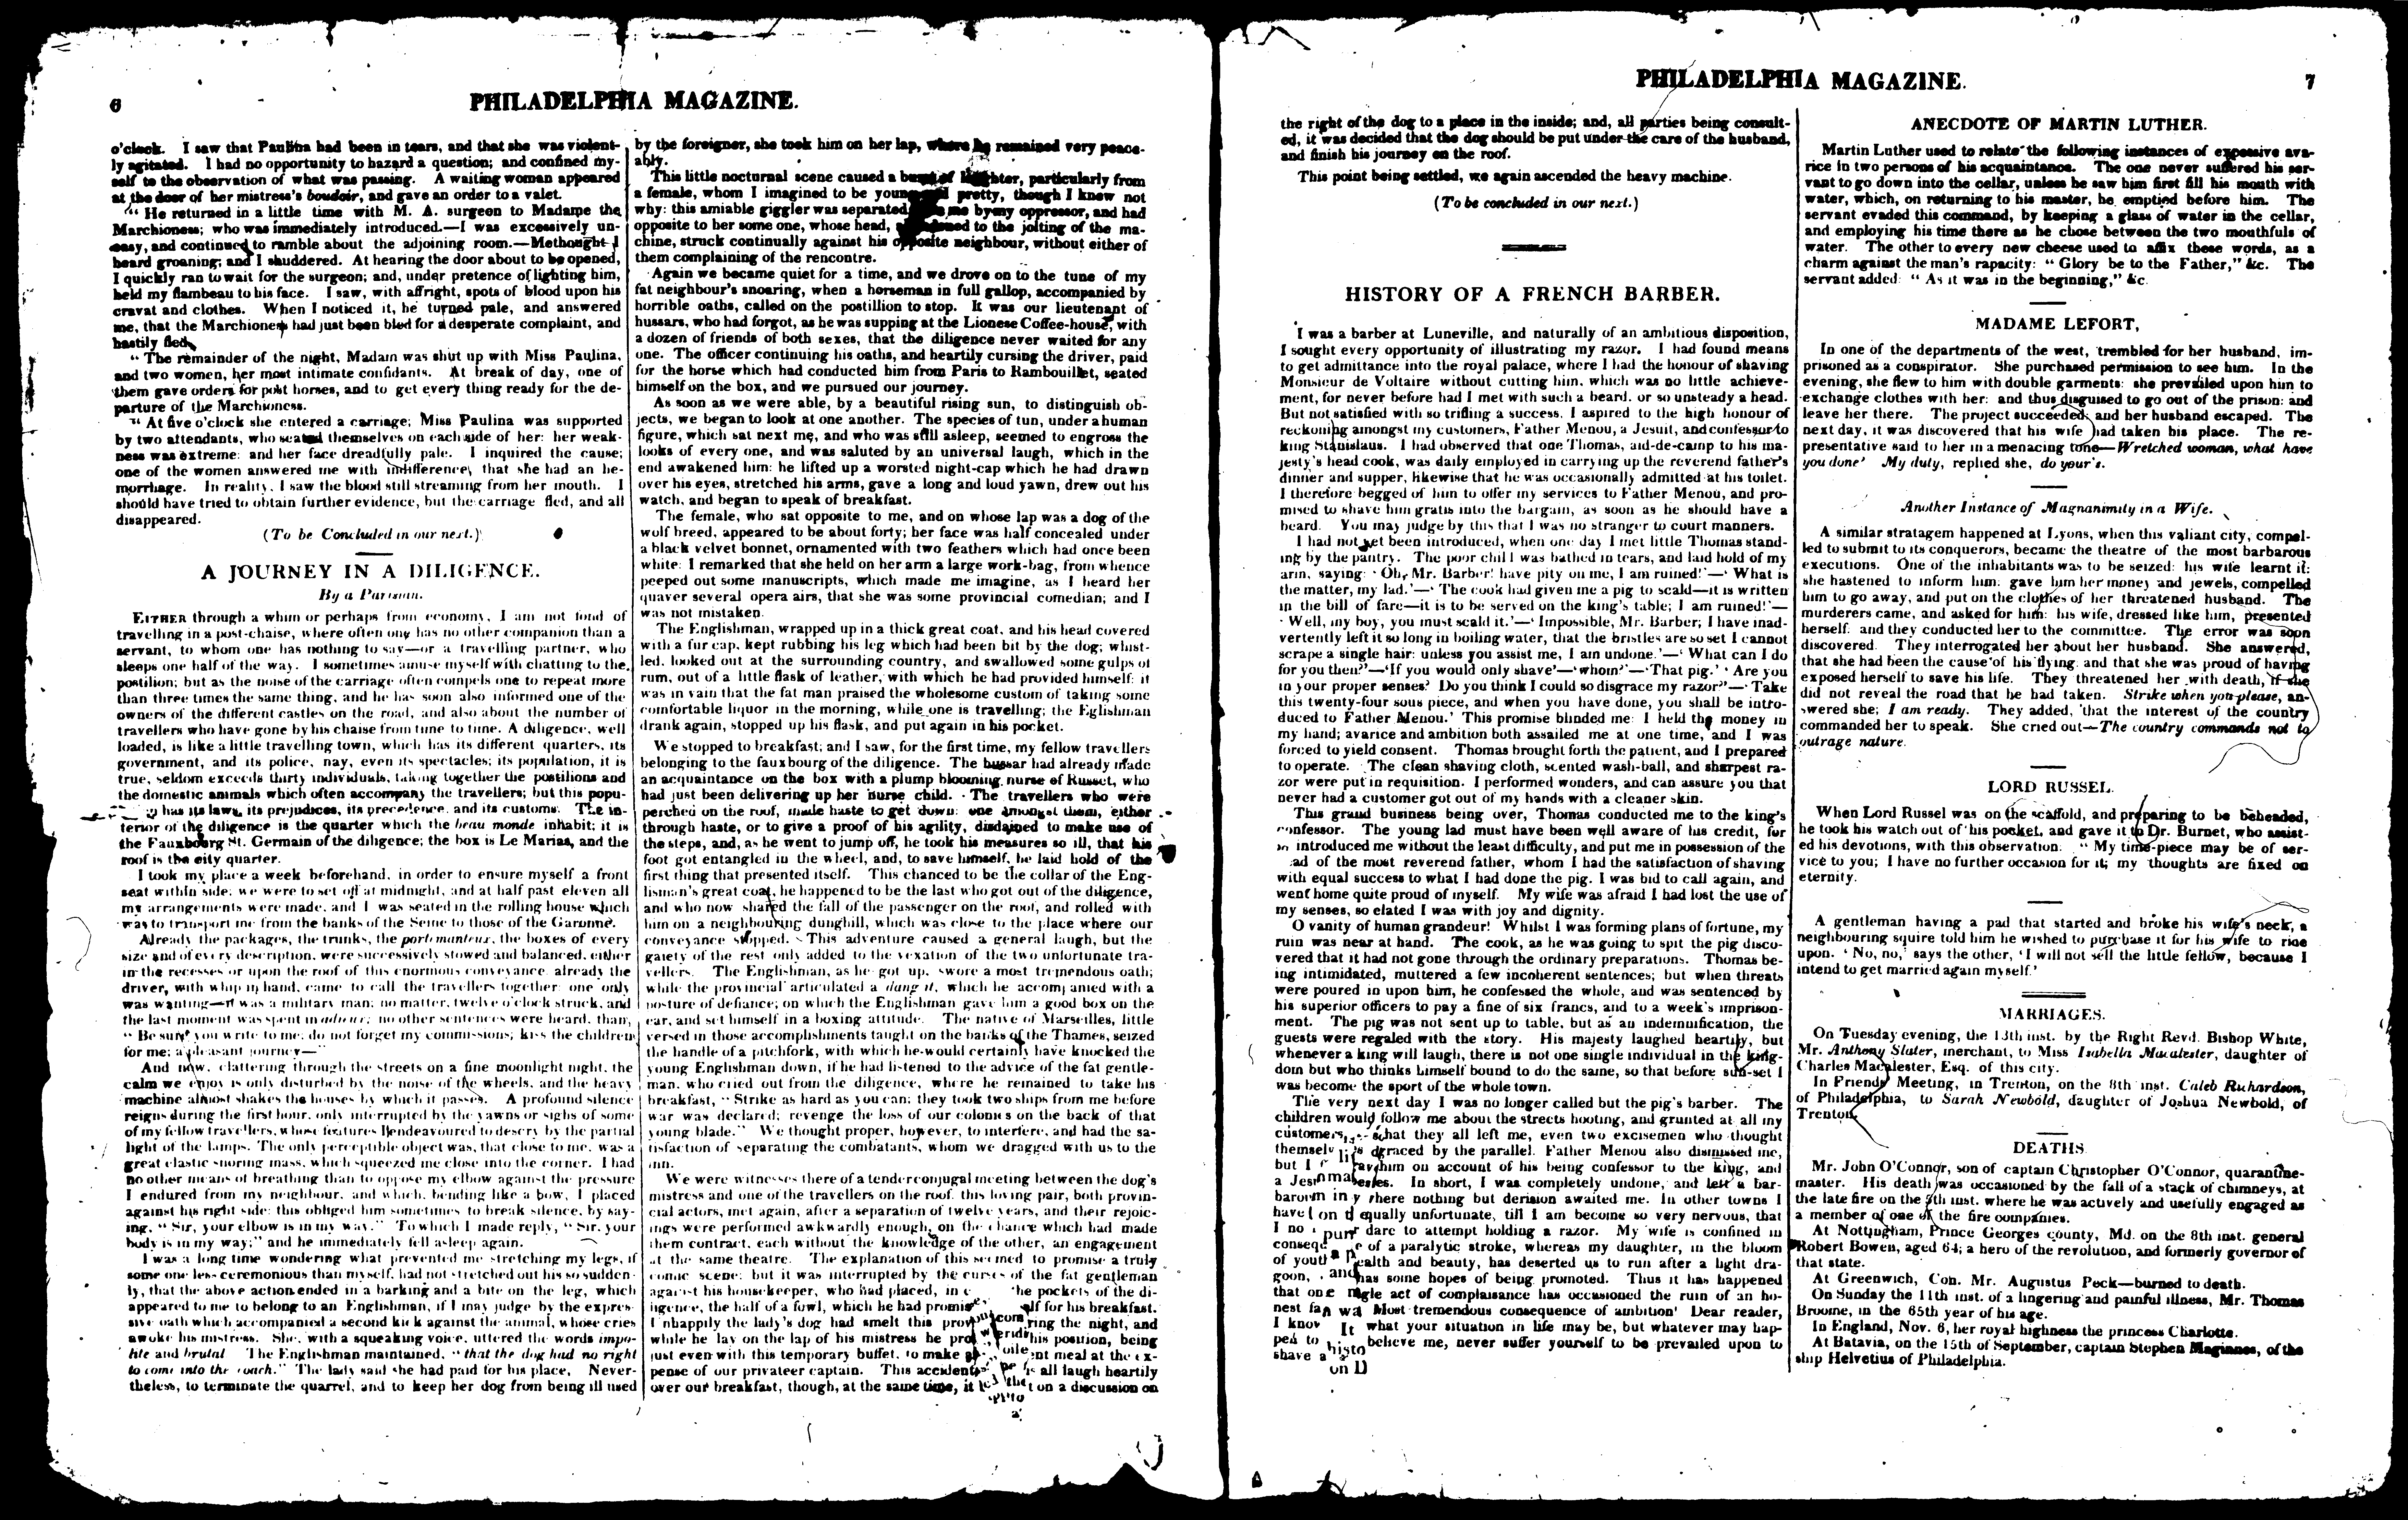
| This thumbnail links to a full-size crop of the 2400 dpi, reflective scan shown in thumbnail #12. This crop shows a portion of the 'full size' image linked to #12, although it is still of slightly lesser quality than the original because it was compressed with 'medium' jpeg compression. Reducing the resolution to 2400 dpi from 4800 dpi cuts the scan times in half and still seems to produce acceptable quality. | This thumbnail links to a 1.0 MB file that is a full size image of a scan from the Epson V750 Pro flatbed scanner. It was a reflective scan, set to 16->8 bit grayscale at 2400 dpi. This shows the same pages as the #10 image but scanned at 2400 dpi rather than at 4800. A jpeg compression setting of "7" was used in Photoshop CS3 to produce the jpeg file. |
|
#13 |
#14 |
 |
|
| This thumbnail links to a full-size crop of the 2400 dpi, transparency scan shown in thumbnail #14. In this case, the transparency was laid directly on the lower glass, without the use of any film holder. | This thumbnail links to 1.1 MB file that is a full-size image of a 2400 dpi, transparency scan with the film lying directly on the lower glass, with no film holder used. The only problem I encountered with this arrangement is that the upper glass is several millimeters above the film and the film has room to curl. If the film lays flat, all is great as in the above sample. If the film does not lay flat, then some of the image will be in focus and some out of focus. The depth of field is not large, so it does not take a lot of film curl to cause problems |
|
#15 |
#16 |
 |
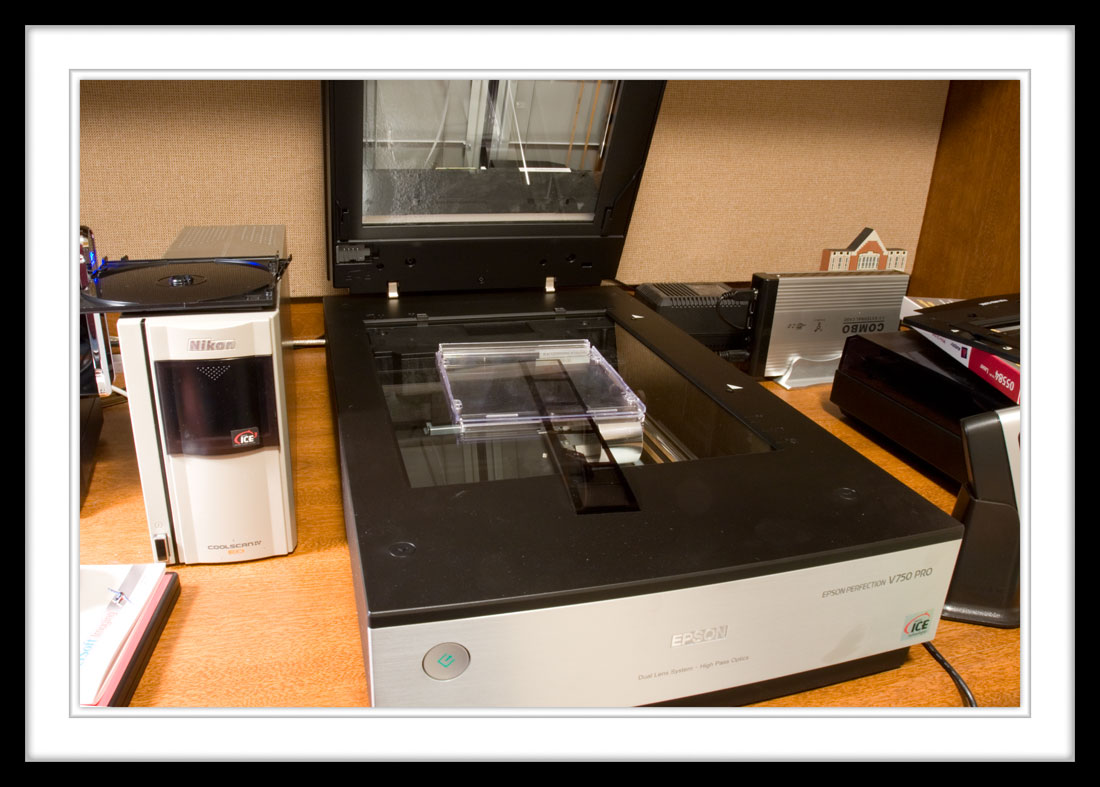 |
| This is the film strip used for the testing. It is low contrast, positive, 35 mm microfilm. | This is the makeshift film holder that I used to hold the microfilm for the Epson V750 Pro when scanning in transparency mode.. It seems to work well. Obviously the cover was down during the scan. There is just enough room between the top and bottom glass plates of the scanner to accommodate the 2 CD case covers without them touching the top glass. Scanning through plastic is not ideal but the images still seem good enough to me for documentation purposes. Optical quality glass could always be used or a special holder without glass could be fabricated to fit the microfilm strips. None of the holders supplied by Epson with the scanner would fit the microfilm. |
Visit www.JustPhtotos.ca |
|